

Laravel multi authentication is a feature in Laravel that allows you to have users with different roles such as admin and user on your Laravel application. Let's say you want to create a blog website where users can sign up to read, like, comment and even make a post on your blog. For this, you need to have regular users that will be able to read, like, comment and make a post on your blog. And also, admins who can see and delete users' posts that do not follow your blog's rules will be created.
Our focus in this tutorial is based on using Laravel Guards. We will have two types of users.
- Users(regular users)
- Admins
Also, there will be different data tables and registration pages for users and admins. Both regular users and admins will be able to log in using a single login page. Now then, let's get started.
Creating A New Project
Before you get started, make sure you have the following installed on your computer.
- XAMPP(cross-platform, Apache, MySQL, PHP and Perl)
- Composer - Laravel
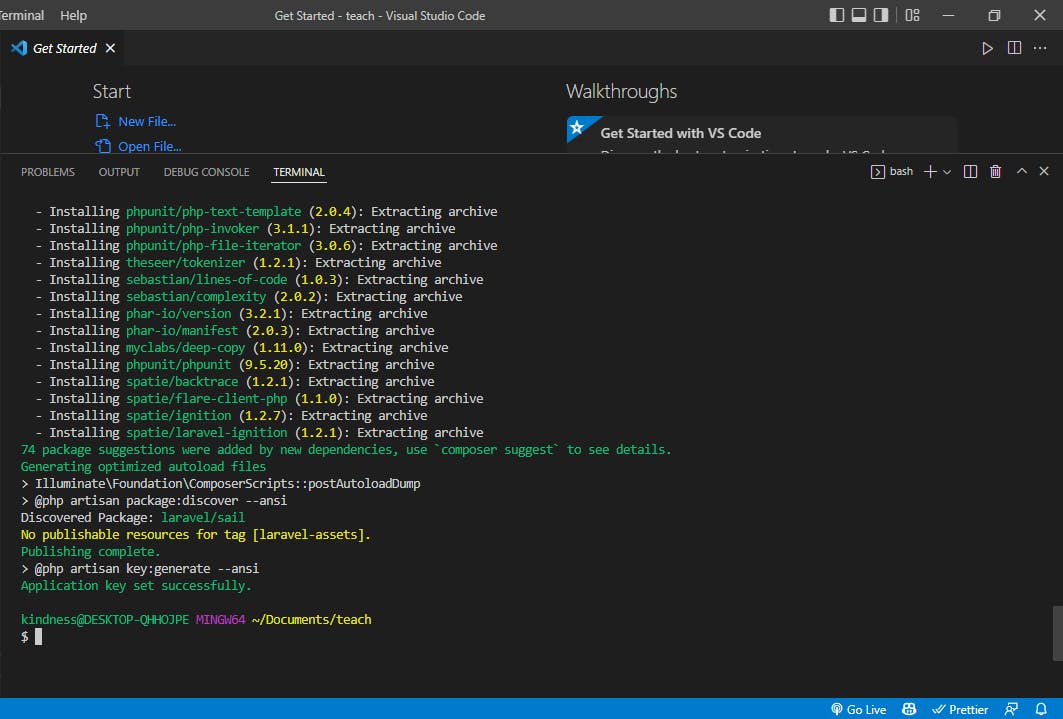
Type in the following command in your terminal to create a new project if you already have Laravel set up.
composer create-project --prefer-dist laravel/laravel multiauth
Create A Database, Set Up The .env File And Run Migrations
Create A Database
Next up, you are going to use phpMyAdmin in XAMPP to create a database and set up the .env file in our Laravel application.
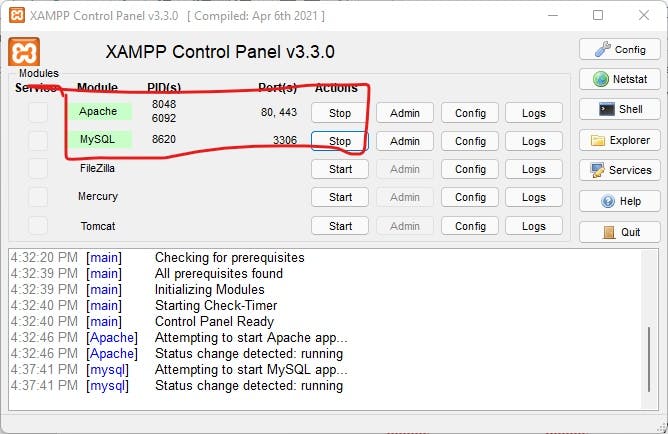
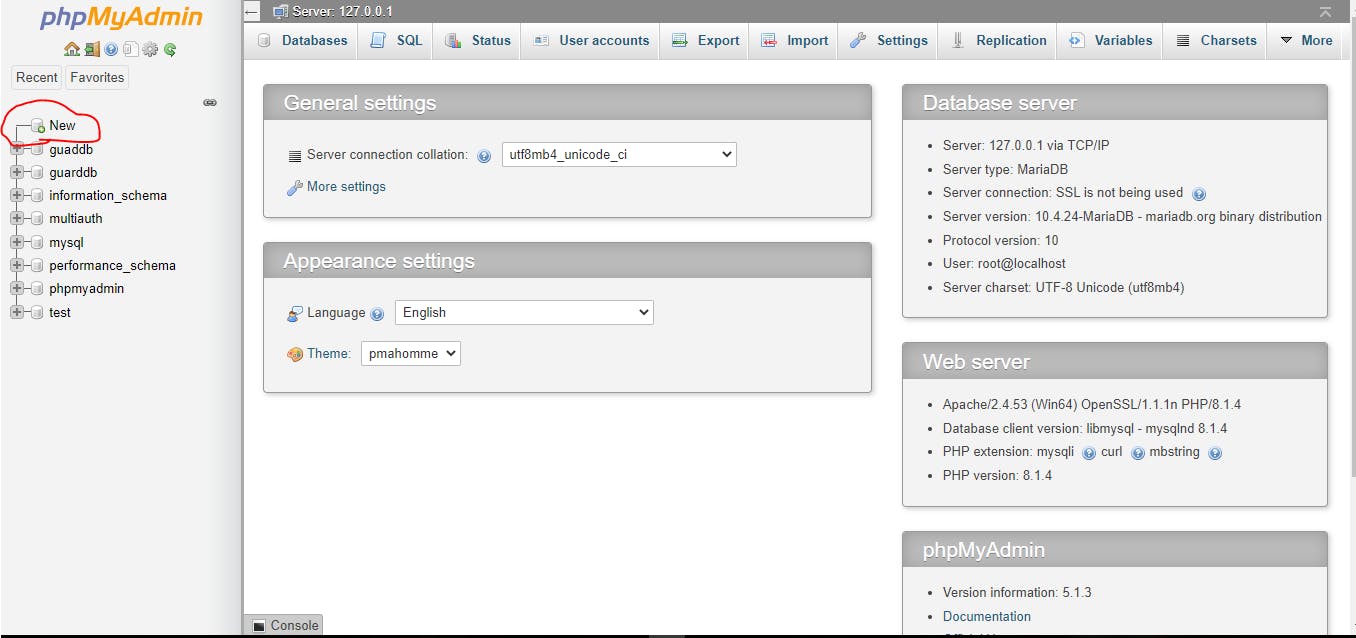
Now let’s create a database. Open XAMPP. Make sure that Apache and MySQL are running.
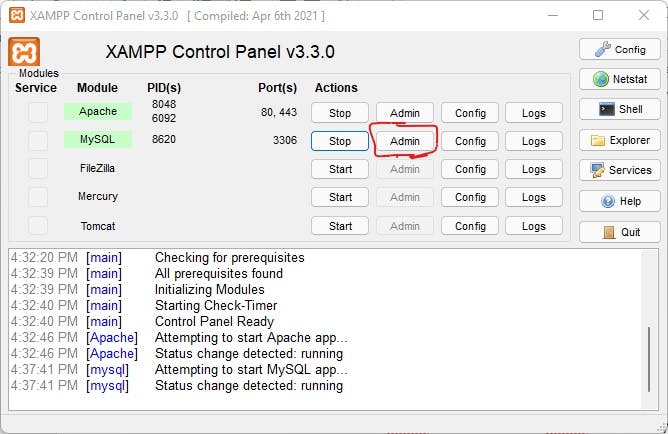
Click on Admin on MySQL and a new tab will open in your browser. This tab is where you will create a database for the laravel application.
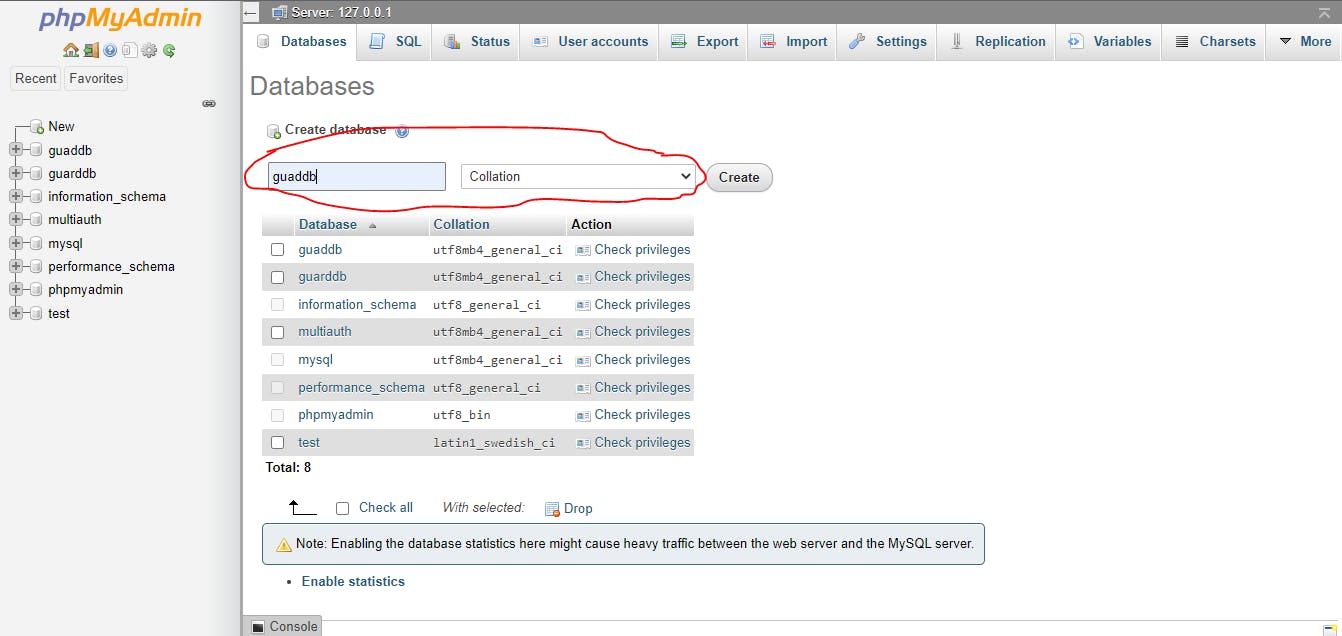
Click on new and name the database guarddb. Select collation in the next field and click on create. There will be a new database created. After creating the database, you will notice that it is empty.
So in the next step, you will run migrations in Laravel which will create tables in the database. Go to multiauth\database\migrations. You can see that users' table is already created. Recall that you are creating two tables- users and admins. Next, you will create the admins' table.
Open your terminal and run the code below.
php artisan make:migration create_admins_table
Next, go to multiauth\database\migrations\2022_04_19_222859_create_admin_table.php. Paste the code below under public function up().
     $table->string('name');
     $table->string('email')->unique();
     $table->timestamp('email_verified_at')->nullable();
     $table->string('password');
     $table->rememberToken();

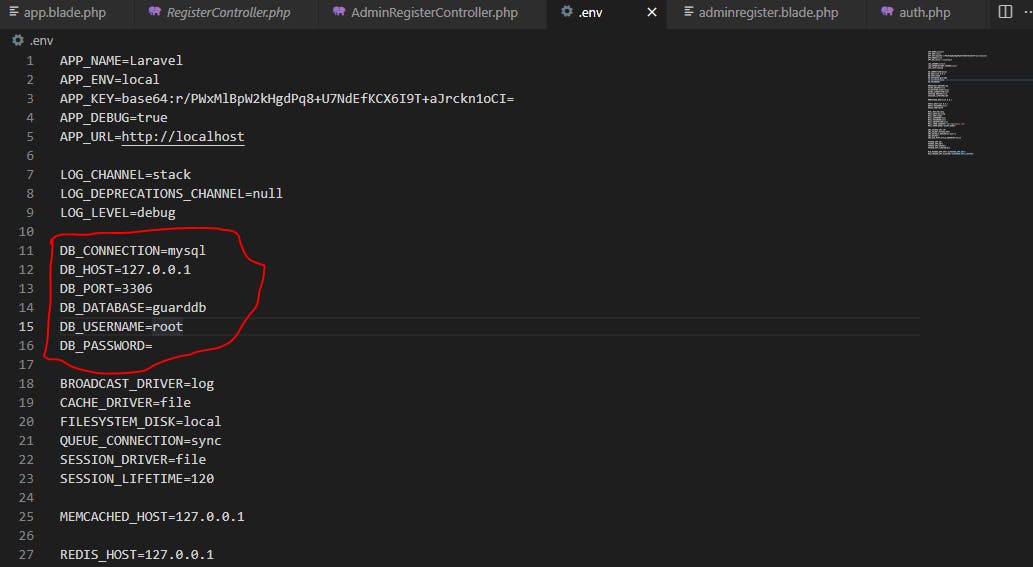
Set Up The .env File
Open the .env file and rename DB_DATABASE to guarddb. The default DB_USERNAME is root.
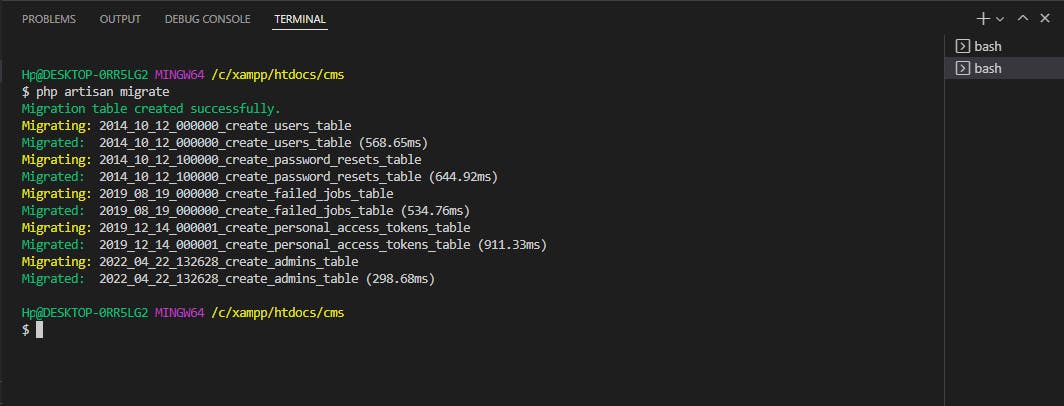
Run Migrations
Finally, run the code below in the terminal. This will migrate all the tables into the database.
php artisan migrate
Create Admin Model
Go to multiauth\app\Models. The user model is already created by default in Laravel but you will have to create a model for the admin. Open the terminal and run the code below.
php artisan make:model Admin
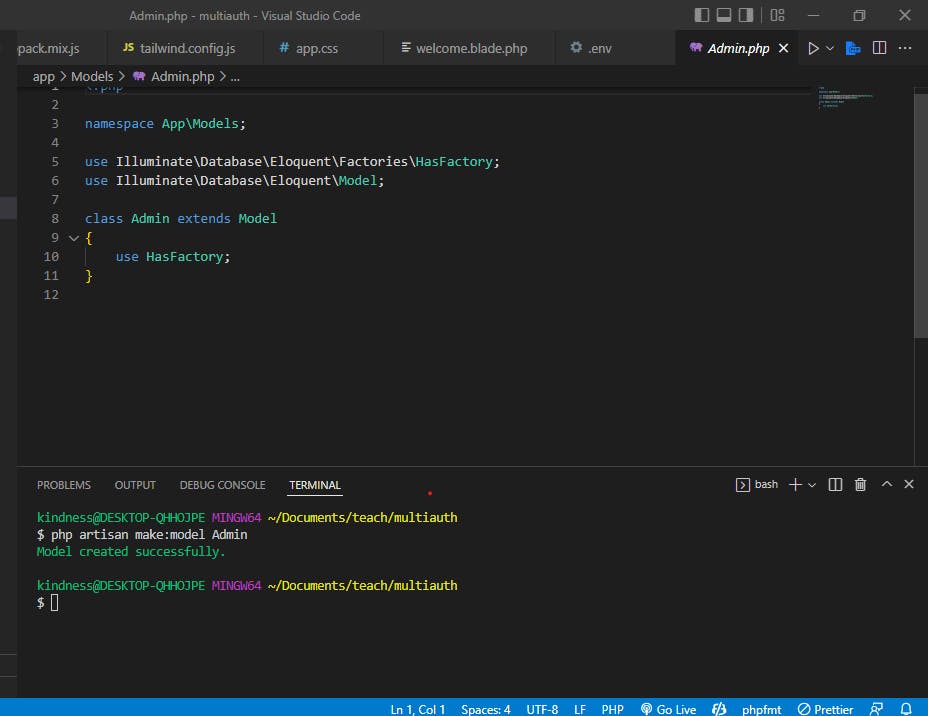
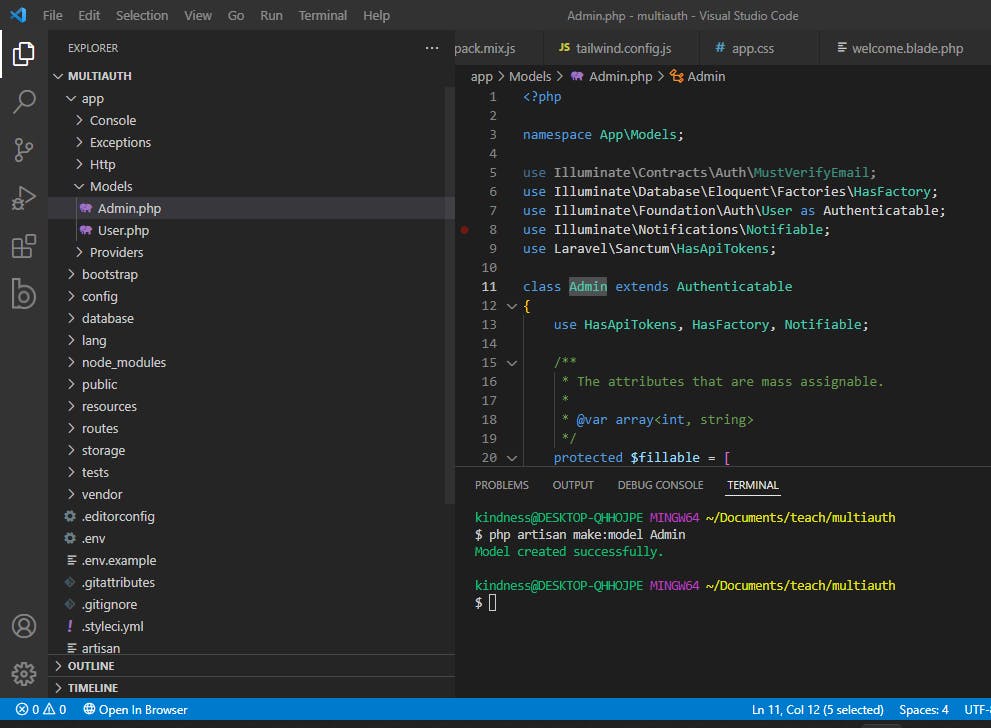
Copy all that is in the User model and paste it into the Admin model. Now, change class User extends Authenticatable to class Admin extends Authenticatable.
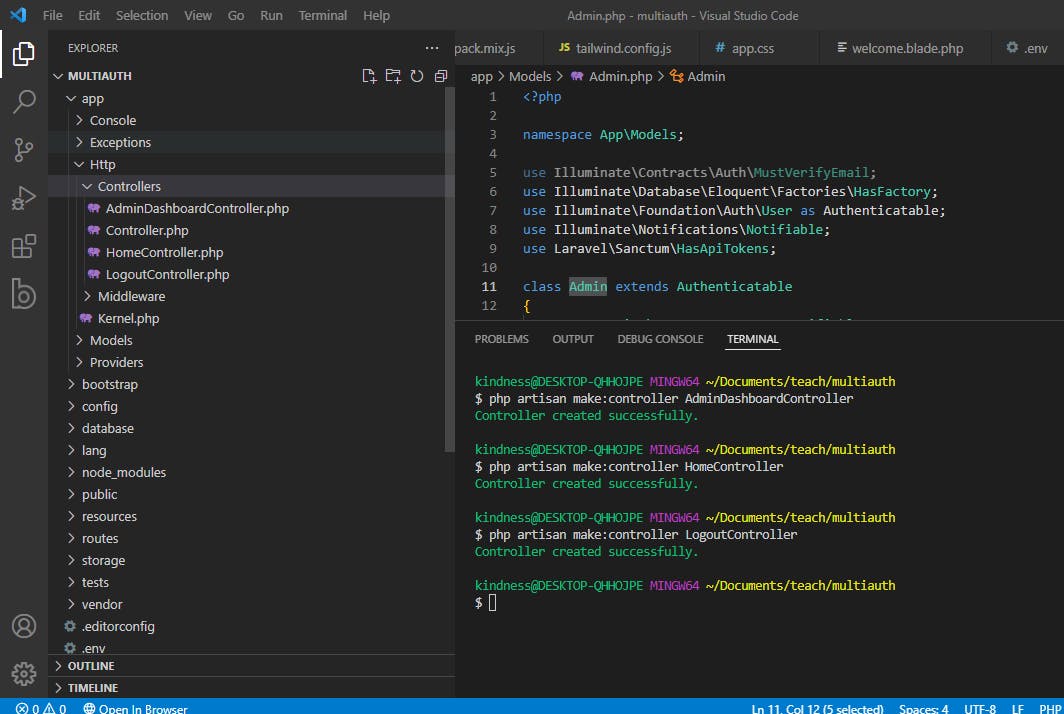
Create The Controllers
You have created the database, Admin Model and ran migrations. Next, create the following controllers.
- AdminDashboardController
- HomeController
- LogoutController
- AdminRegisterController - LoginController
- RegisterController
Open the terminal and run the following codes one after the other.
php artisan make:controller AdminDashboardController
php artisan make:controller HomeController
php artisan make:controller LogoutController
Next, paste the following codes into each of the controllers.
AdminDashboardController
 public function index()
    {
        return view('admin.admindashboard');
    }
HomeController
public function index()
    {
        return view('home');
    }
LogoutController
 public function store()

    {

        auth()->logout();

        return redirect()->route('login');
    }
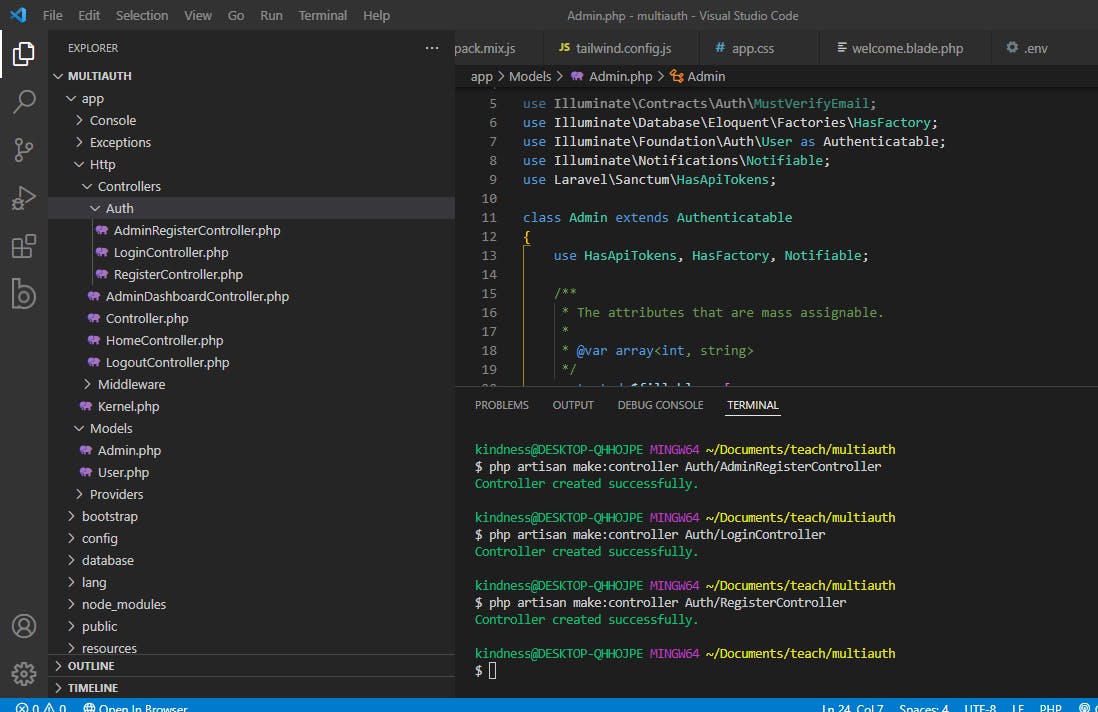
When that is done, Go to multiauth\app\Http\Controllers and create a new folder called Auth. Open the terminal again and run the following codes one after the other.
php artisan make:controller Auth/AdminRegisterController
php artisan make:controller Auth/LoginController
php artisan make:controller Auth/RegisterController
Select all and Paste the following codes into each of the controllers below.
AdminRegisterController
public function index()
    {

        return view('auth.adminregister');
    }

    public function store(Request $request)
    {
        //validate user
        $this->validate($request, [
            'name' => 'required|max:255',
            'email' => 'required|email|max:255',
            'password' => 'required|confirmed',
        ]);

        //store user
        Admin::create([
            'name' => $request->name,
            'email' => $request->email,
            'password' => Hash::make($request->password),
        ]);

        //signin admin and redirect
        Auth::guard('admins')->attempt($request->only(['email', 'password']));
        return redirect()->route('admin-dashboard');
    }
LoginController
public function index()
    {
        return view('auth.login');
    }

    public function store(Request $request)
    {


        $this->validate($request, [
            'email' => 'required|email',
            'password' => 'required',
        ]);


            $credentials = ['email' => $request->email, 'password' => $request->password];

            if (Auth::guard('admins')->attempt($credentials, $name) ) {
                $request->session()->regenerate();

                return redirect('/admin-dashboard');
            }
            elseif (auth()->attempt($request->only('email', 'password'), $request->remember)) {
                return redirect('/home');

            }

            return back()->with('status', 'Invalid login details');

    }
RegisterController
 public function index()
    {
        return view('auth.register');
    }

    public function store(Request $request)
    {
        //validate user
        $this->validate($request, [
            'name' => 'required|max:255',
            'email' => 'required|email|max:255',
            'password' => 'required|confirmed',
        ]);


        //store user
        User::create([
            'name' => $request->name,
            'email' => $request->email,
            'password' => Hash::make($request->password),
        ]);

        //signin user and redirect

        auth()->attempt($request->only(['email', 'password']));
        return redirect()->route('home');
    }
Set Up The Guard For Admins
Since the Users' guard is already created by default under web, we are going to set up a guard for Admins. These guards will redirect ADMIN and USER to their respective pages after they have logged in.
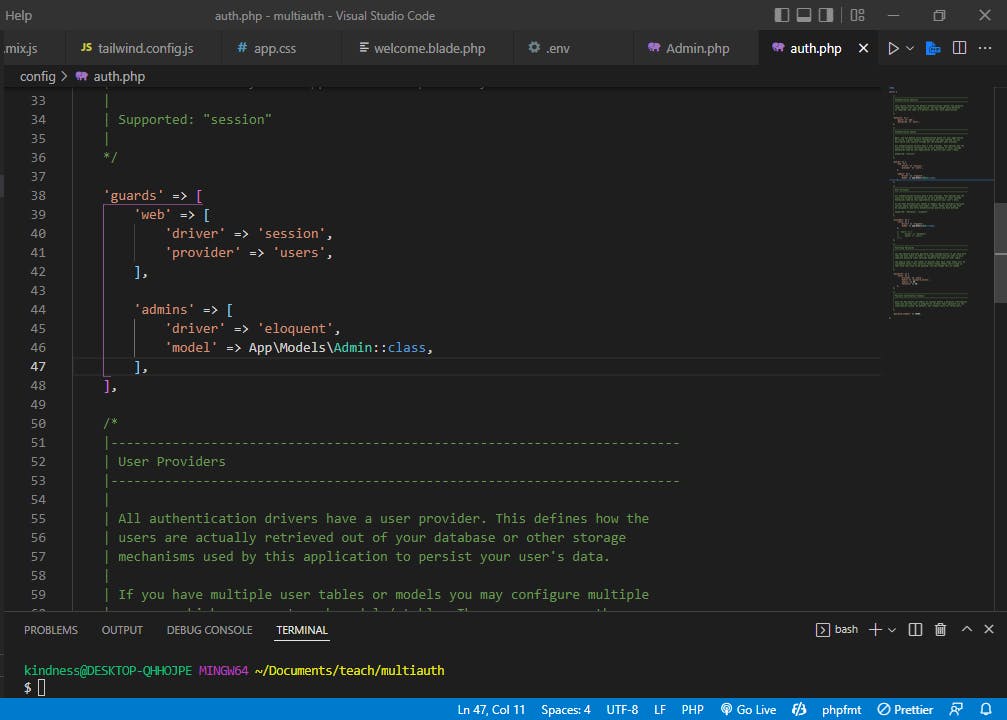
Goto multiauth\config\auth.php. Paste the code below inside guards.
        'admins' => [
            'driver' => 'session',
            'provider' =>'admins',
        ],
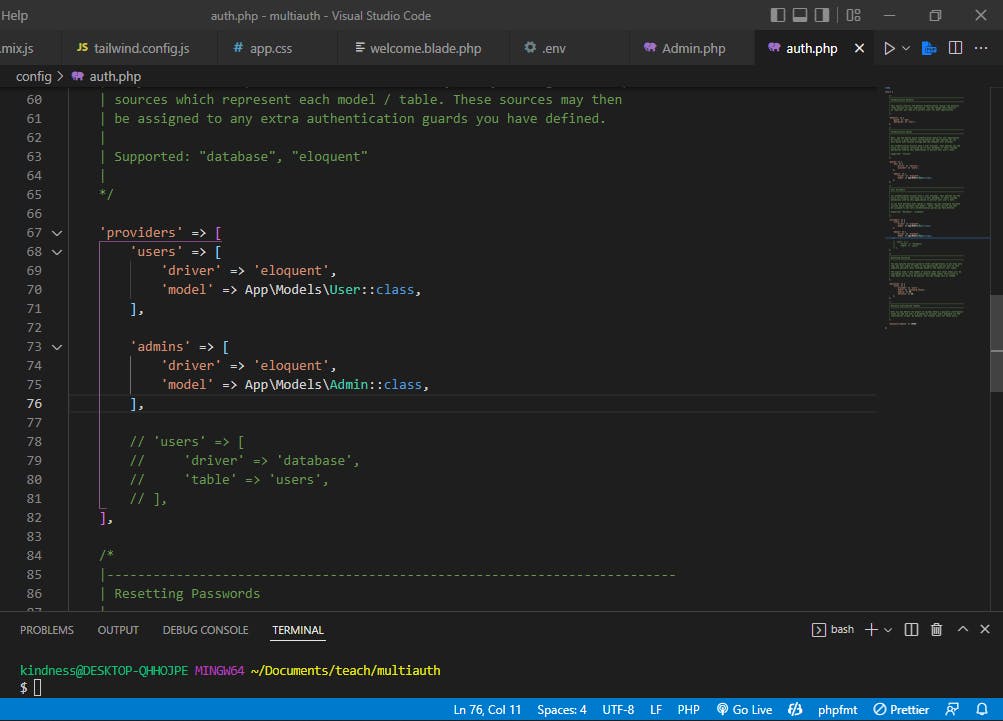
Scroll down and you will see providers. Paste the code below inside providers and that’s it.
'admins' => [
            'driver' => 'eloquent',
            'model' => App\Models\Admin::class,
 The guards you have set up the is already being used in the LoginController. These guards will allow Laravel to redirect Users and Admins to a specific page after logging in.
Set Up The Views For The Laravel Application
Tailwindcss is used to create all the views in this application. If you would like to use tailwindcss and you don’t know how to install it in Laravel, check out [How to install tailwindcss in laravel].
First, let's create the layout view. Go to multiauth\resources\views/layouts. There, you will see a file named welcome.blade.php. Rename welcome.blade.php to app.blade.php.
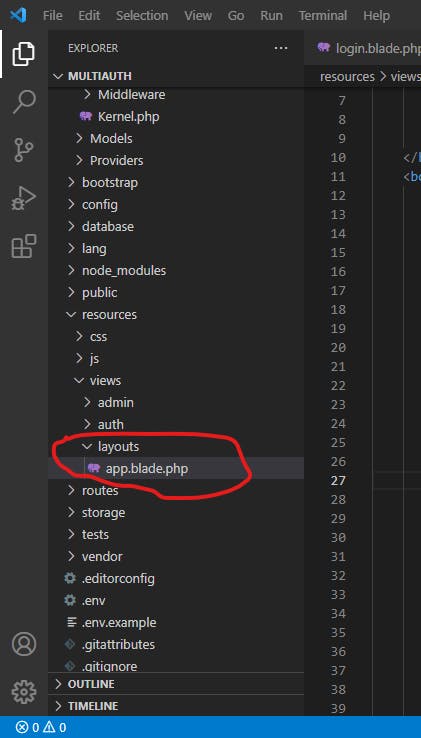
Highlight all that is in app.blade.php and delete. Then paste the code below in app.blade.php.
<!DOCTYPE html>
<html lang="en">

<head>
    <meta charset="UTF-8">
    <meta name="viewport" content="width=device-width, initial-scale=1.0">
    <meta http-equiv="X-UA-Compatible" content="ie=edge">
    <title>Multiauth</title>

    <link rel="stylesheet" href="{{ asset('css/app.css') }}">
</head>

<body class="bg-gray-200">
    <nav class="p-6 bg-white flex justify-between mb-6">

            @auth

                <li>
                    <form  action=" {{ route('logout') }}" method="post" class="p-3 inline">
                        @csrf
                        <button type="submit">Logout</button>
                    </form>
                </li>

            @endauth


            @guest
                <li>
                    <a href="{{ route('login') }} " class="p-3">Login</a>
                </li>
                <li>
                    <a href="{{ route('register') }}" class="p-3">Register</a>
                </li>
            @endguest

        </ul>{{-- {{ route('login') }} --}}
        {{-- {{ route('register') }} --}}
    </nav>


    @yield('content')
</body>

</html>
Next, you will create a login page where both Admins and Users can log in. And then you will create a register page(for regular users) and adminregister page(for admins).
Still, in the views folder, create a folder named auth.
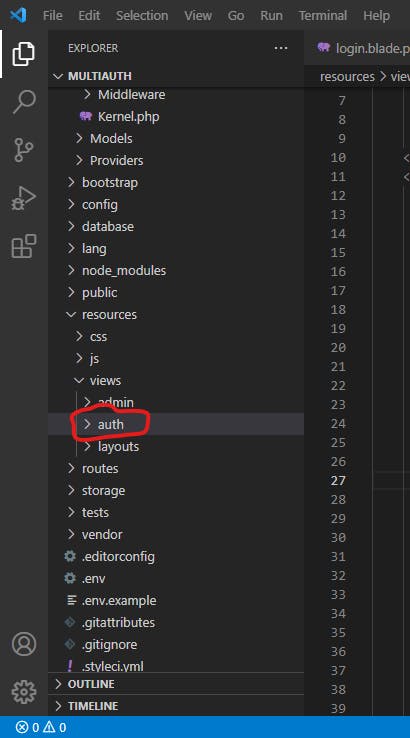
Goto multiauth\resources\views\auth and create the following files.
- login.blade.php
- register.blade.php
- adminregister.blade.php
Open login.blade.php and paste the code below
@extends('layouts.app')

@section('content')
    <div class="flex justify-center">

        <div class="w-4/12 bg-white p-6 rounded-lg">
            @if (session('status'))
                <div class="bg-red-500 p-4 rounded-lg mb-6 text-white text-center">
                    {{ session('status') }}
                </div>
            @endif

            <div class="flex justify-center">
                <div class="w-8/12 bg-white p-6 rounded-lg text-center">
                   Login
                </div>
            </div>

            <form action="{{ route('login') }}" method="post">
                @csrf

                <div class="mb-4">
                    <label for="email" class="sr-only">Email</label>
                    <input type="text" name="email" id="email" placeholder="Your email"
                        class="bg-gray-100 border-2 w-full p-4 rounded-lg @error('email') border-red-500 @enderror"
                        value="{{ old('email') }}">

                    @error('email')
                        <div class="text-red-500 mt-2 text-sm">
                            {{ $message }}
                        </div>
                    @enderror
                </div>

                <div class="mb-4">
                    <label for="password" class="sr-only">Password</label>
                    <input type="password" name="password" id="password" placeholder="Choose a password"
                        class="bg-gray-100 border-2 w-full p-4 rounded-lg @error('password') border-red-500 @enderror"
                        value="">

                    @error('password')
                        <div class="text-red-500 mt-2 text-sm">
                            {{ $message }}
                        </div>
                    @enderror
                </div>

                <div>
                    <button type="submit" class="bg-blue-500 text-white px-4 py-3 rounded font-medium w-full">Login</button>
                </div>
            </form>
        </div>
    </div>
@endsection
Open register.blade.php and paste the code below
@extends('layouts.app')

@section('content')
    <div class="flex justify-center">
        <div class="w-4/12 bg-white p-6 rounded-lg">
            <div class="flex justify-center">
                <div class="w-8/12 bg-white p-6 rounded-lg text-center">
                   Register
                </div>
            </div>
            <form action="{{ route('register') }}" method="post">
                @csrf
                <div class="mb-4">
                    <label for="name" class="sr-only">Name</label>
                    <input type="text" name="name" id="name" placeholder="Your name"
                        class="bg-gray-100 border-2 w-full p-4 rounded-lg @error('name') border-red-500 @enderror"
                        value="{{ old('name') }}">

                    @error('name')
                        <div class="text-red-500 mt-2 text-sm">
                            {{ $message }}
                        </div>
                    @enderror
                </div>

                <div class="mb-4">
                    <label for="email" class="sr-only">Email</label>
                    <input type="text" name="email" id="email" placeholder="Your email"
                        class="bg-gray-100 border-2 w-full p-4 rounded-lg @error('email') border-red-500 @enderror"
                        value="{{ old('email') }}">

                    @error('email')
                        <div class="text-red-500 mt-2 text-sm">
                            {{ $message }}
                        </div>
                    @enderror
                </div>

                <div class="mb-4">
                    <label for="password" class="sr-only">Password</label>
                    <input type="password" name="password" id="password" placeholder="Choose a password"
                        class="bg-gray-100 border-2 w-full p-4 rounded-lg @error('password') border-red-500 @enderror"
                        value="">

                    @error('password')
                        <div class="text-red-500 mt-2 text-sm">
                            {{ $message }}
                        </div>
                    @enderror
                </div>

                <div class="mb-4">
                    <label for="password_confirmation" class="sr-only">Password again</label>
                    <input type="password" name="password_confirmation" id="password_confirmation"
                        placeholder="Repeat your password"
                        class="bg-gray-100 border-2 w-full p-4 rounded-lg @error('password_confirmation') border-red-500 @enderror"
                        value="">

                    @error('password_confirmation')
                        <div class="text-red-500 mt-2 text-sm">
                            {{ $message }}
                        </div>
                    @enderror
                </div>

                <div>
                    <button type="submit"
                        class="bg-blue-500 text-white px-4 py-3 rounded font-medium w-full">Register</button>
                </div>
            </form>
        </div>
    </div>
@endsection
Open adminregister.blade.php and paste the code below
@extends('layouts.app')

@section('content')
    <div class="flex justify-center">
        <div class="w-4/12 bg-white p-6 rounded-lg">
            <div class="flex justify-center">
                <div class="w-8/12 bg-white p-6 rounded-lg text-center">
                   Admin Register
                </div>
            </div>
            <form action="{{ route('admin/register') }}" method="post">
                @csrf
                <div class="mb-4">
                    <label for="name" class="sr-only">Name</label>
                    <input type="text" name="name" id="name" placeholder="Your name"
                        class="bg-gray-100 border-2 w-full p-4 rounded-lg @error('name') border-red-500 @enderror"
                        value="{{ old('name') }}">

                    @error('name')
                        <div class="text-red-500 mt-2 text-sm">
                            {{ $message }}
                        </div>
                    @enderror
                </div>

                <div class="mb-4">
                    <label for="email" class="sr-only">Email</label>
                    <input type="text" name="email" id="email" placeholder="Your email"
                        class="bg-gray-100 border-2 w-full p-4 rounded-lg @error('email') border-red-500 @enderror"
                        value="{{ old('email') }}">

                    @error('email')
                        <div class="text-red-500 mt-2 text-sm">
                            {{ $message }}
                        </div>
                    @enderror
                </div>

                <div class="mb-4">
                    <label for="password" class="sr-only">Password</label>
                    <input type="password" name="password" id="password" placeholder="Choose a password"
                        class="bg-gray-100 border-2 w-full p-4 rounded-lg @error('password') border-red-500 @enderror"
                        value="">

                    @error('password')
                        <div class="text-red-500 mt-2 text-sm">
                            {{ $message }}
                        </div>
                    @enderror
                </div>

                <div class="mb-4">
                    <label for="password_confirmation" class="sr-only">Password again</label>
                    <input type="password" name="password_confirmation" id="password_confirmation"
                        placeholder="Repeat your password"
                        class="bg-gray-100 border-2 w-full p-4 rounded-lg @error('password_confirmation') border-red-500 @enderror"
                        value="">

                    @error('password_confirmation')
                        <div class="text-red-500 mt-2 text-sm">
                            {{ $message }}
                        </div>
                    @enderror
                </div>

                <div>
                    <button type="submit"
                        class="bg-blue-500 text-white px-4 py-3 rounded font-medium w-full">Register</button>
                </div>
            </form>
        </div>
    </div>
@endsection
Create another folder in views and name the folder admin. Admins will redirect to this page when they log in. Create a file called admindashboard.blade.php in the admin folder and paste the code below.
@extends('layouts.app')

@section('content')
    <div class="flex justify-center">
        <div class="w-8/12 bg-white p-6 rounded-lg">
           Admin Dashboard
        </div>
    </div>
@endsection
Goto multiauth\resources\views and create a file called home.blade.php.
When a regular user logs in to the application, He/She will be redirected to home.blade.php. Open the home.blade.php and paste the code below.
@extends('layouts.app')

@section('content')
    <div class="flex justify-center">
        <div class="w-8/12 bg-white p-6 rounded-lg">
            Home
        </div>
    </div>

@endsection
Set Up The Routes
In this final stage, we are going to set up the routes to each of the pages we have created. Go to multiauth\routes\web.php and then paste the code below into the web.php file.
Route::get('/', function () {
    return view('home');
});

Route::get('/home', [HomeController::class, 'index'])->name('home');


//Login Route
Route::get('/login', [LoginController::class, 'index'])->name('login');
Route::post('/login', [LoginController::class, 'store']);

//logout route
Route::post('/logout', [LogoutController::class, 'store'])->name('logout');

//Register Route
Route::get('/register', [RegisterController::class, 'index'])->name('register');
Route::post('/register', [RegisterController::class, 'store']);

//Admin Register Route
Route::get('admin/register', [AdminRegisterController::class, 'index'])->name('admin/register');
Route::post('admin/register', [AdminRegisterController::class, 'store']);

//Admin Dashboard Route
Route::get('/admin-dashboard', [AdminDashboardController::class, 'index'])->name('admin-dashboard');
Route::post('/admin-dashboard', [AdminDashboardController::class, 'store']);
Now, run php artisan serve in the terminal and click on register to create a new user. Go to http://127.0.0.1:8000/admin/register in the browser and create an admin user. Finally, log in both users. Regular users will redirect to the home page after logging in. Admins will redirect to the admin dashboard after logging in.
Conclusion: Multi authentication allows you to have users with different roles on your website. There are other ways of implementing multi authentication in laravel. Using guards in laravel is also one good way to implement multi authentication in laravel.