

Tailwind CSS is a utility-first CSS framework. It allows you to easily build beautiful bespoke designs without writing any CSS. As a developer, you definitely would have struggled with media queries, responsiveness, and loads of CSS while creating large projects. Tailwindcss allows you to build user interfaces without having to go through the hassle of writing CSS.
We are going to install tailwindcss and all its dependencies through the terminal in Visual Studio Code(VS Code). In this guide, we will install tailwindcss using PostCSS.
Prerequisites
For this to work you are going to have Node.js installed on your computer. Make sure Node.js is installed before installing tailwindcss.
Installing Tailwind CSS
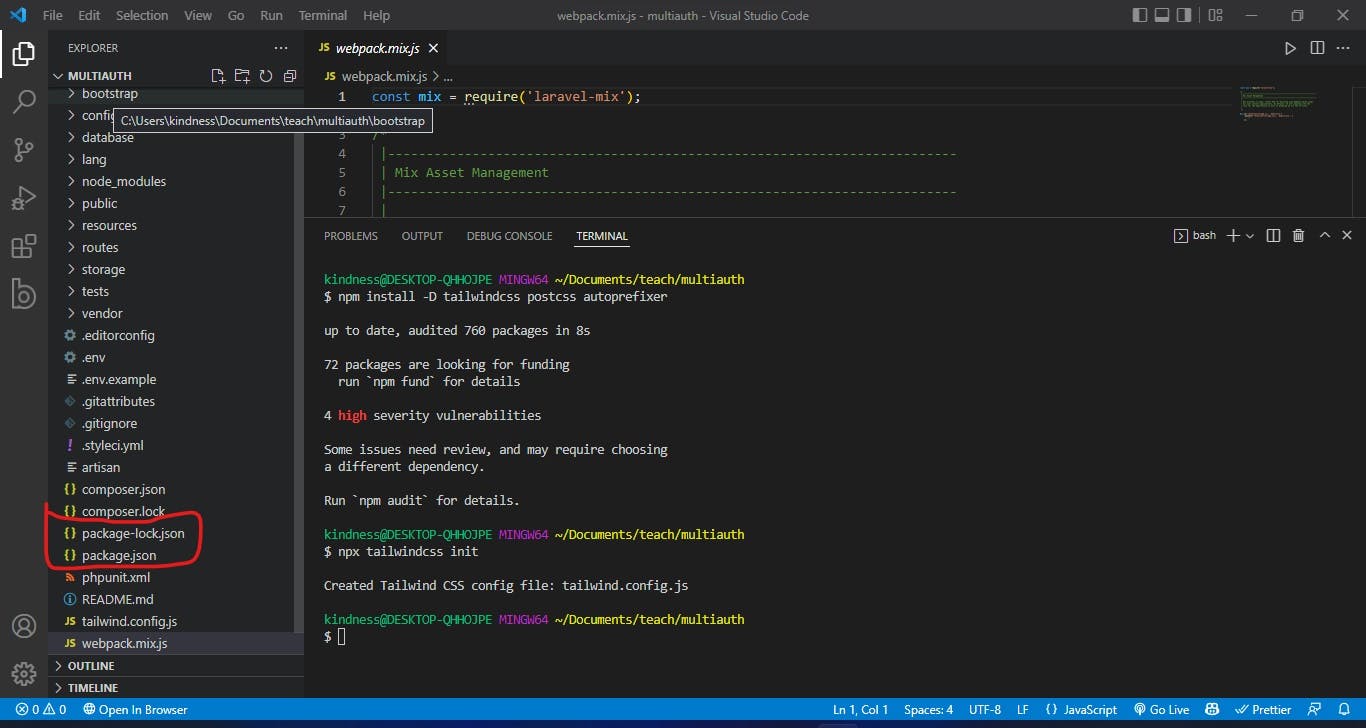
Open your terminal. Paste the command below and run it.
npm install -D tailwindcss postcss autoprefixer
This command will install all the dependencies needed to get tailwindcss working.
After you have run the code, npm will create
package.json and package-lock.json files.
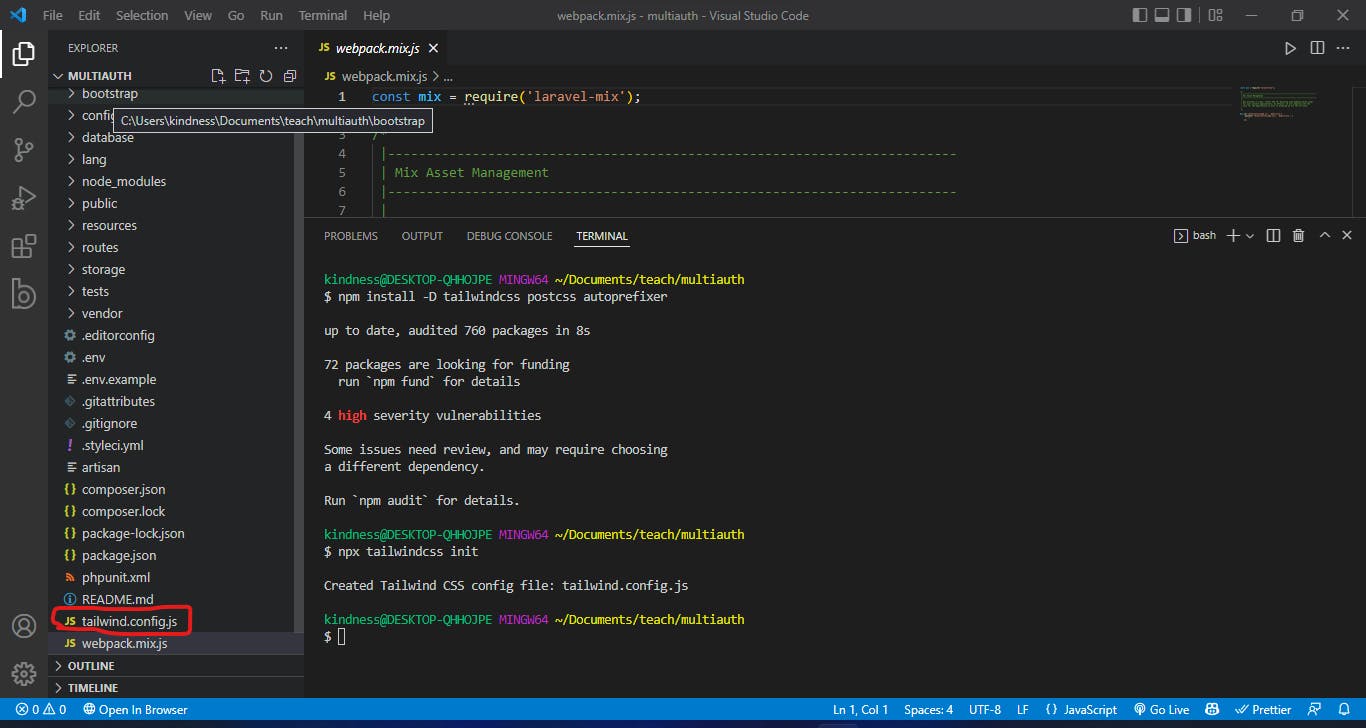
Create a tailwind.config.js file
Now that you have finished installing tailwindcss, you will have to create a tailwind.config.js file by running the code below.
npx tailwindcss init
This will create a tailwind.config.js file.
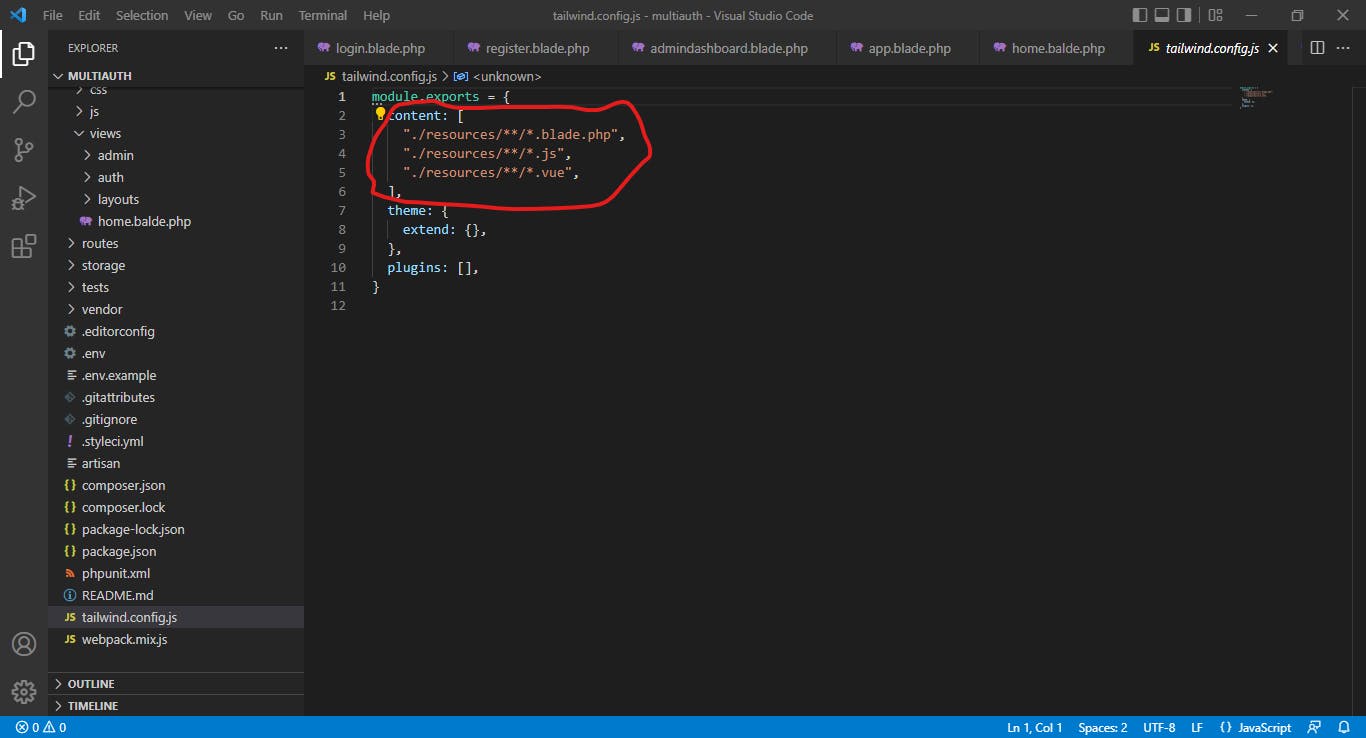
Setup tailwind.config.js file
Once you have created the tailwind.config.js file, you will have to set it up. Open tailwind.config.js file and then paste the below code in Content[] .
"./resources/**/*.blade.php",
"./resources/**/*.js",
"./resources/**/*.vue",
Add TailwindCSS to Laravel mix
Recall that PostCSS is the method that we are using to install tailwindcss. so we are going to pass tailwindcss through PostCSS.
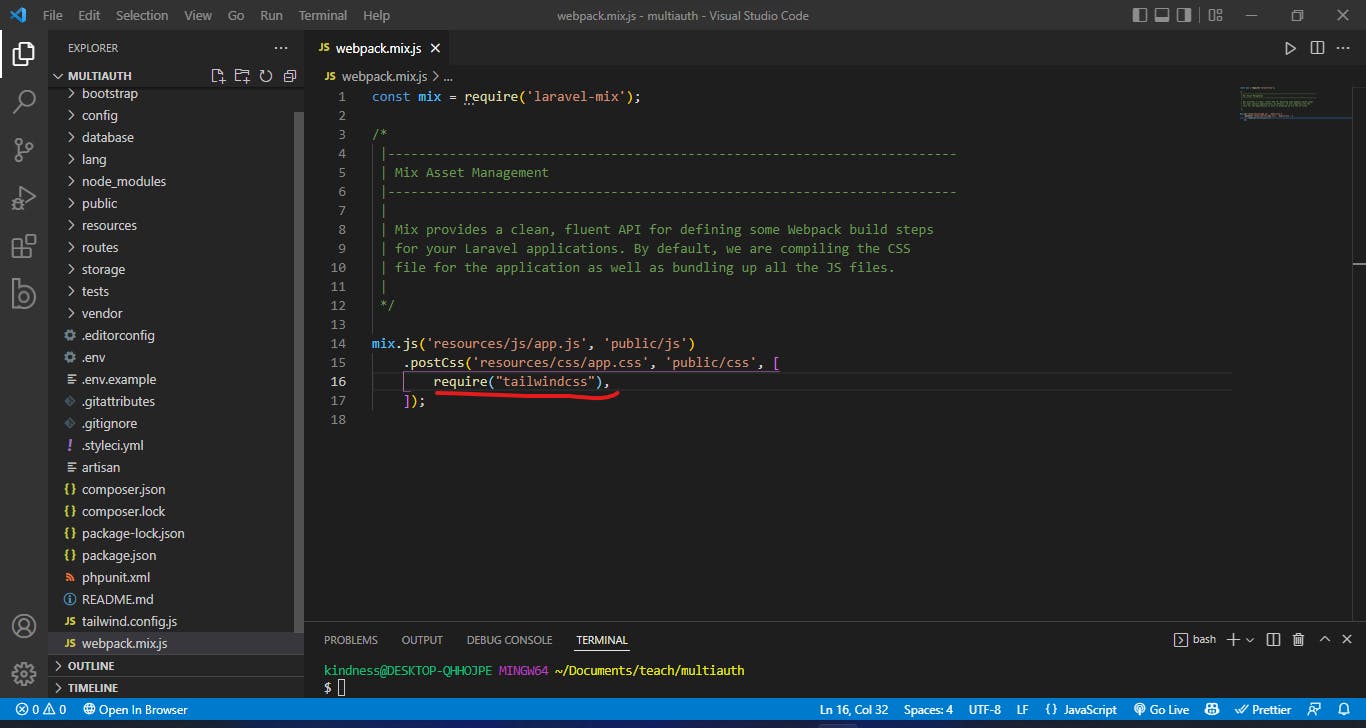
Open the file named webpack.mix.js and paste in the code.
require("tailwindcss"),
Add Tailwind Directives To The CSS File
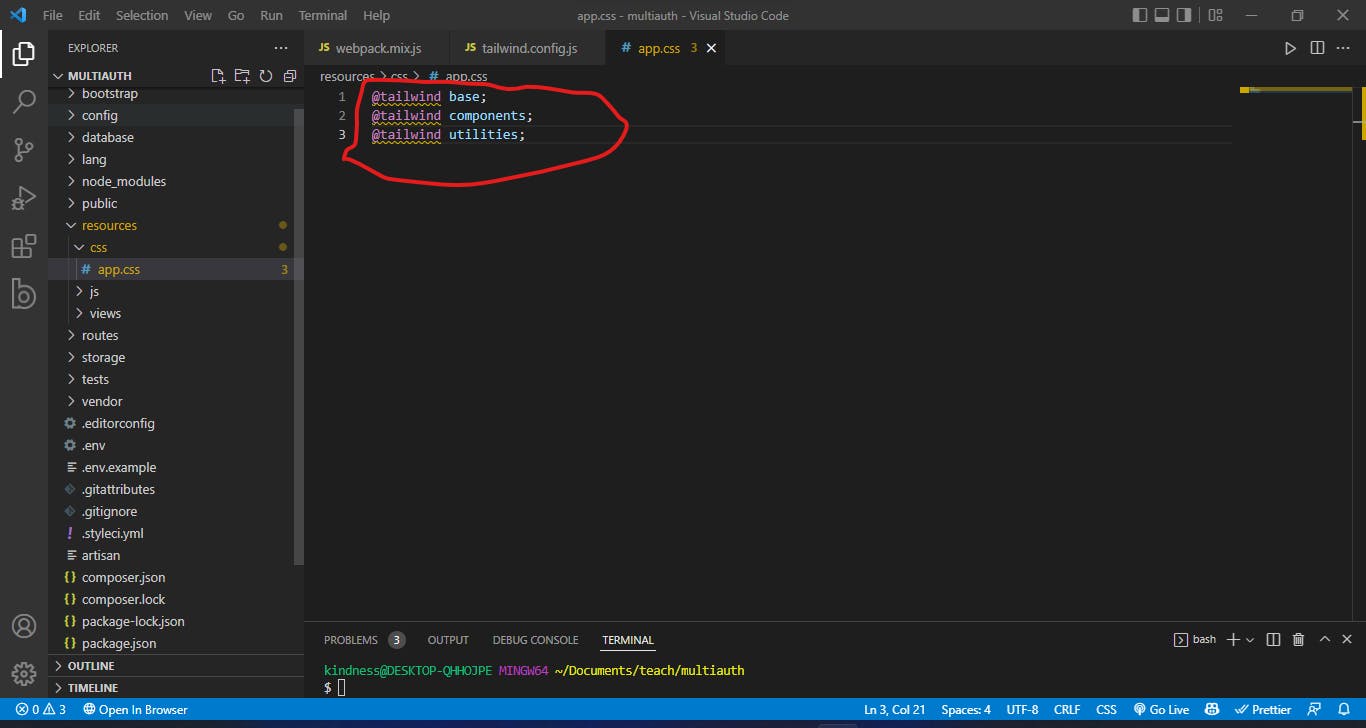
Next, you will need to add the following tailwind directives to your CSS file.
Go to resources\css\app.css and then put in the code below.
 @tailwind base;
 @tailwind components;
 @tailwind utilities;
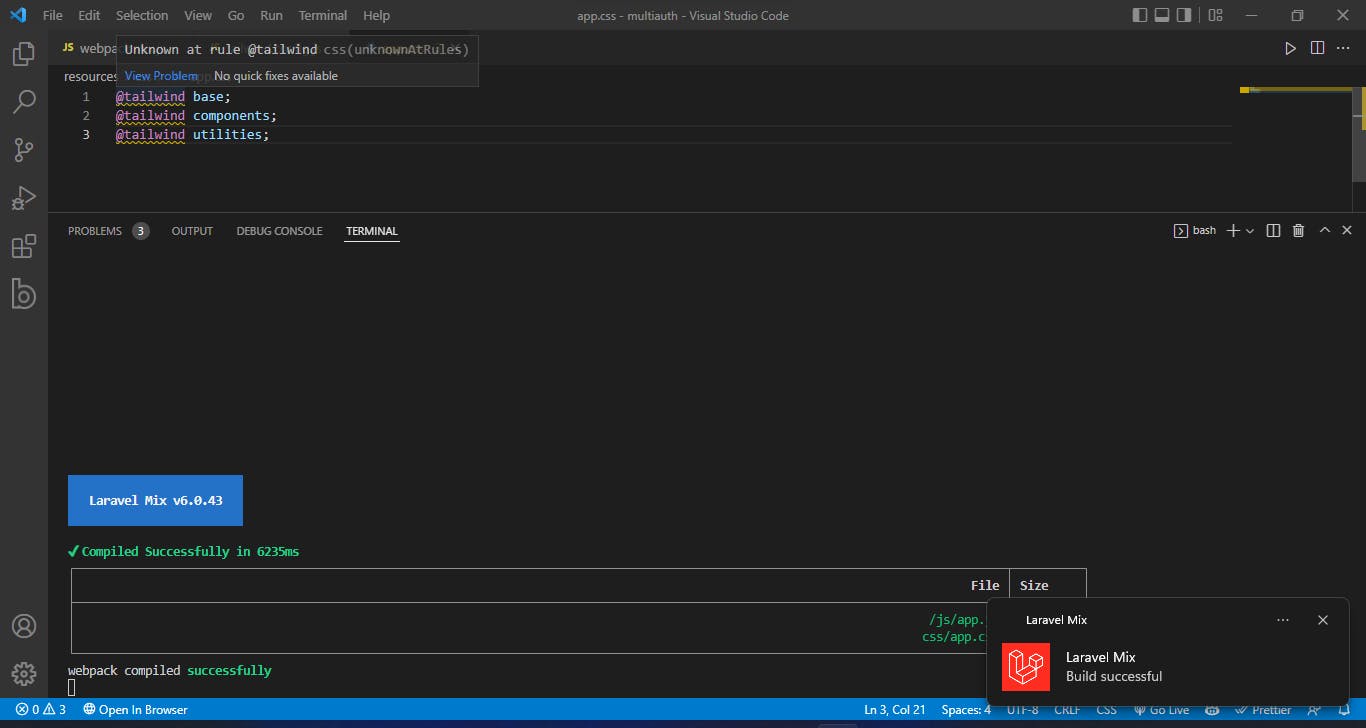
These directives will run the webpack.mix.js file when you run npm run dev in the terminal. They will also include the base components and utilities needed by tailwindcss.
Running TailwindCSS
Finally, run the command npm run dev to get tailwindcss running.
You can also use npm run watch to have tailwindcss listen for any change that you make to your page.
Test It Out
Now that you have installed tailwindcss in your Laravel application, it's time for you to test it out.
Go to resources\views\layouts\welcome.blade.php. Delete everything within the welcome.blade.php as you would not be needing it.
Next, paste a random tailwindcss template, or use the template below.
<!-- background -->
<div class="relative flex min-h-screen flex-col justify-center bg-gradient-to-r from-rose-100 to-teal-100">
  <!-- card -->
  <div class="mx-auto flex w-96 flex-col justify-center bg-white rounded-2xl shadow-xl shadow-slate-300/60">
    <!-- img -->
    <img class="aspect-video w-96 rounded-t-2xl object-cover object-center" src="https://images.pexels.com/photos/3311574/pexels-photo-3311574.jpeg?auto=compress&cs=tinysrgb&w=1260&h=750&dpr=1" />
    <!-- text information -->
    <div class="p-4">
      <small class="text-blue-400 text-xs">Automobile company</small>
      <h1 class="text-2xl font-medium text-slate-600 pb-2">Dodge Car</h1>
      <p class="text-sm tracking-tight font-light text-slate-400 leading-6">Dodge is an American brand of automobiles and a division of Stellantis, based in Auburn Hills, Michigan..</p>
    </div>
  </div>
</div>
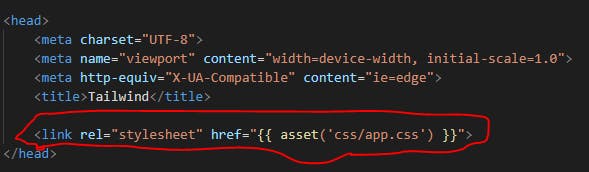
Once you have pasted the template, make sure that <link rel="stylesheet" href="asset ('css/app.css')"> is in the page's head.
After that, run php artisan serve to preview your page

conclusion
Tailwindcss saves developers the hassle of crafting beautiful user interfaces with CSS. With Tailwindcss, production time reduced and productivity increases. That's it. You have finally installed tailwindcss into your laravel application.