

PermalinkWhat Is An API?
API in programming means Application Programming Interface. An API serves as an intermediary and it allows for communication and interaction between two applications. Also, we use API for communication between a server and a client. To make this simpler for you to understand, let’s take for example a restaurant. For a restaurant to function properly, it will have tables where visitors can eat-(This will be the frontend application of the restaurant). The restaurant will also need a kitchen that will prepare food-(This will be the backend application of the restaurant). What the restaurant needs now is a waiter who will serve as API to communicate between the table where you sit and the kitchen where food preparation goes on. The waiter will take your order-(in this scenario, the Request ) and deliver it to the kitchen. The kitchen will work on your order(Request) and return the food you order-(in this scenario the Response) to the waiter. Finally, the waiter will take the food(Response) and deliver it to your table.
You will often at times hear REST API when talking about APIs. REST is an acronym for Representational State Transfer. It provides a set of functions like GET, POST, DELETE, etc. to send requests to a sever data using HTTP(Hypertext Transfer Protocol). REST API uses XML or JSON to transfer data. XML and JSON make it easy to read data output when working with APIs.
PermalinkHTTP Request Methods
An HTTP Request defines a specific action that will happen on a Request-URL. There are many HTTP Request methods, but we will focus on the most commonly used request methods.
PermalinkGET
The GET request method retrieves data from a specified resource on a server.
GET /churches //Get all churches
PermalinkPOST
The POST request method sends data to a server, thereby creating a resource on the server.
POST /create/church //Add a church to a list of churches
PermalinkPUT/PATCH
The PUT request method updates a specific resource that exits on a sever. The PUT request will replace the existing resource entirely and update it with the resource specified in the Request-URL. The PATCH request will replace part of the existing resource and update it with the resource in the Request-URL.
PUT /churches/{id} //Update a church information identified by "id"
PermalinkDELETE
The DELETE request method deletes a specified resource on a server.
PUT /churches/{id} //Delete a church information identified by "id"
PermalinkCONNECT
The CONNECT request method creates a two-way communication(a tunnel) with the requested resource on a server.
CONNECT www.churches.com:443 HTTP/1.1 //connect to www.churches.com using port:443 and HTTP version 1.1
PermalinkTRACE
The TRACE request method returns an HTTP request to the requesting client. We use the TRACE method when debugging.
TRACE /index.html
PermalinkHTTP Status Codes
An HTTP status code is a response to a client’s request. When a server receives a client’s request, it responds to the request with a three-digit code. This three-digit code is known as the HTTP STATUS CODE.
Status codes have a different range. The first number within a range remains the same. The next two other numbers can be any number. Let’s take a look at the status code range.
Permalink- 1xx
Status codes within the 1xx range are Informational. They give updates to the client while the HTTP request is processing.
Permalink- 2xx
Status codes within the 2xx range are Success Message. They return a success message after processing the HTTP request.
Permalink- 3xx
Status codes within the 3xx range are about redirections.
Permalink- 4xx
Status codes within the 4xx range are about client errors. They return an error message after sending the HTTP request to the server.
Permalink- 5xx
Status codes within the 5xx range are about to server errors. They return an error message after the HTTP request reaches the server.
Now let’s talk about some of the common status codes within the range mentioned above.
Permalink- Code: 100
The 100 status code tells the client to continue with the request.
Permalink- Code: 200
The 200 status code tells the client that the request was successful.
Permalink- Code: 201
The 201 status code tells the client that the creation of a resource was successful. The 201 status code integrates within the 200 code.
Permalink- Code: 204
The 204 status code tells the client that the request status fulfilment was successful. The 204 status works after performing an update method.
Permalink- Code: 301
The 301 status code tells the client that the endpoint requested is in another location. This also allows the change of the HTTP method used for a request.
Permalink- Code: 307
The 307 status code tells the client that the endpoint requested has a temporary redirect. This does not allow the change of the HTTP method used for a request.
Permalink- Code: 308
The 308 status code tells the client that the endpoint requested has a permanent redirect. This does not allow the change of the HTTP method used for a request.
Permalink- Code: 400
The 400 status code tells the client that the server cannot process the request sent without giving a specific reason.
Permalink- Code: 401
The 401 status code tells the client that the server cannot process the request sent because the credentials submitted to the server is invalid.
Permalink- Code: 403
The 403 status code tells the client that the server cannot process the request because it is forbidden due to a lack of authorization. Example: When one user tries to access another user’s data.
Permalink- Code: 404
The 404 status code tells the client that the resource requested does not exist on the server.
Permalink- Code: 405
The 405 status code tells the client that the HTTP request method is not allowed. Example: Using a POST method when you should use a GET method.
Permalink- Code: 422
The 422 status code tells the client that the data sent is invalid. Example: summiting an invalid email address when signing up.
Permalink- Code: 500
The 500 status code is used as a general status code when the server cannot return a particular status code.
Permalink- Code: 501
The 501 status code tells the client that the server cannot handle the request.
Permalink- Code: 504
The 504 status code tells the client that the was no response within a given period.
PermalinkCreating Our Laravel Project
In this tutorial, we will need an API client to create and test our API. For this, we are going to use Postman. Postman is very easy to set up so there is no need to worry. Head over to Postman website and signup if you do not already have an account there. When you are done with that, head over to Postman download and download the Postman desktop application. Install the application and log in to your account. You will need to download the desktop application to test your APIs on your local computer.
Now that we are through installing Postman desktop application, let’s create our Laravel application. We are going to create an API for churches. The API is going to contain a directory of different churches. Some of the details of the churches will be name, address, phone number etc. Open the preferred folder where you want to install the Laravel application and run the command below.
composer create-project --prefer-dist laravel/laravel churchesapi
After creating our project, we will need to run it on our local computer using the command below.
php artisan serve
PermalinkSet Up Database And Migration
Next, we will create our database using XAMPP and then connect the database to our Laravel application using the .env file. The database name will be “churchesapi”.
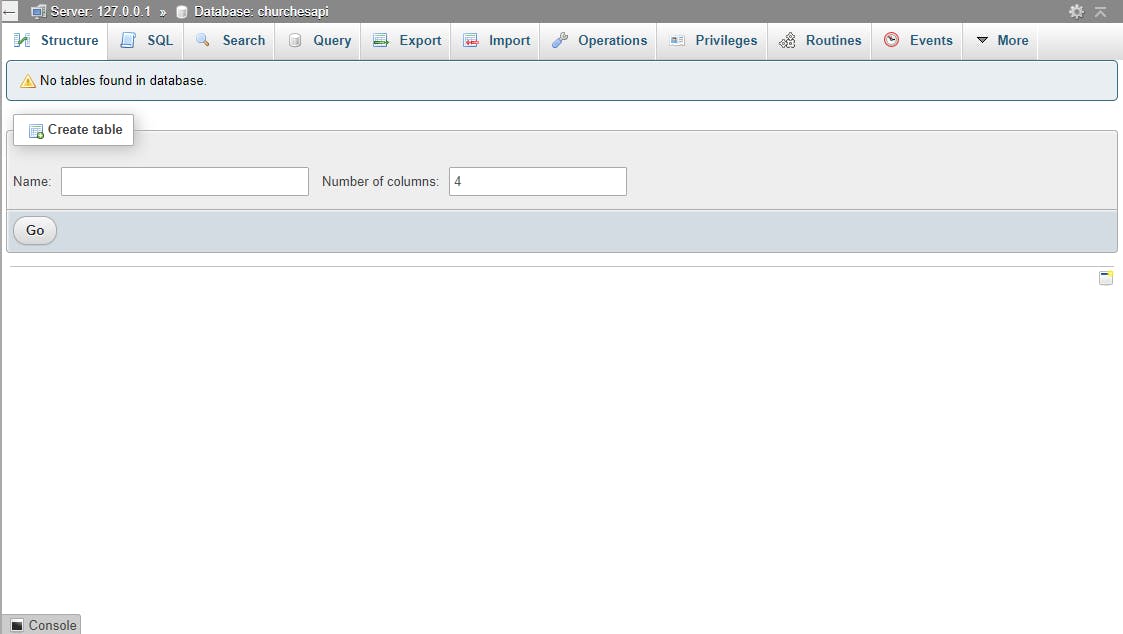

Let’s create our migration table for the list of churches that will be in our database. In the terminal, run the command below.
php artisan make:migration create_churches_table
In our churches table, we are going to create columns for church name->“church_name”, church address->“address”, church contact email->”email”, image of the church->” image_link”, church contact number->” phone”. So copy the code below and paste it into the “create_churches_table” in the migrations folder.
$table->string('church_name');
$table->string('address');
$table->string('email')->unique('email');
$table->string('image_link');
$table->string('phone')->unique('phone');
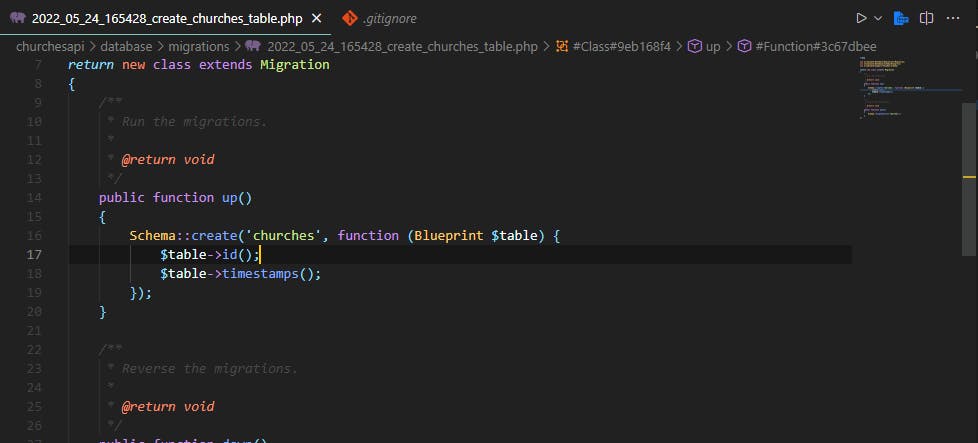
Once we are through adding the columns to the migration table, we can run the command below to migrate all the tables to the database.
php artisan migrate
PermalinkCreating ChurchesController And Churches Model
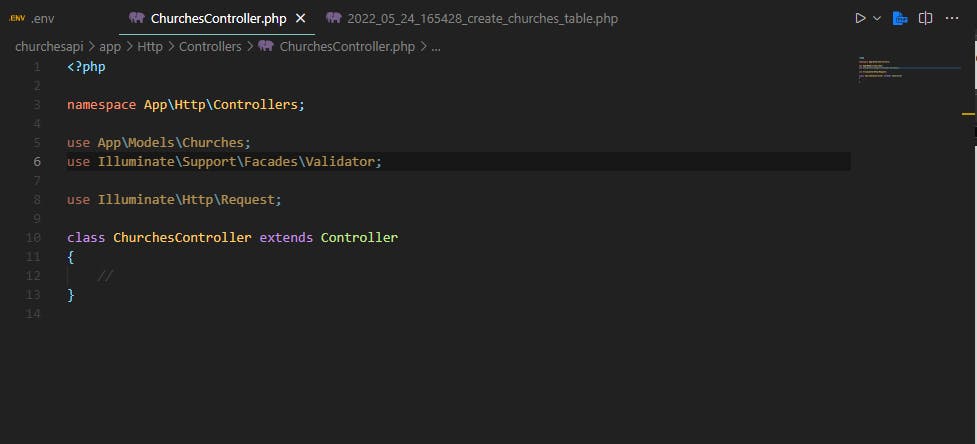
We have created our project, set up the database, and run migrations. So now, let’s create our churches controller and model. In our churches controller, we will create three methods. The first method will create and store information about a particular church in our database. The second method will get a list of all the churches we will create. The third method will allow us to search through the list of all the churches we will create. To create the churches controller and model together, we will use the command below.
php artisan make:model Churches -c
PermalinkController Methods
PermalinkFirst Method
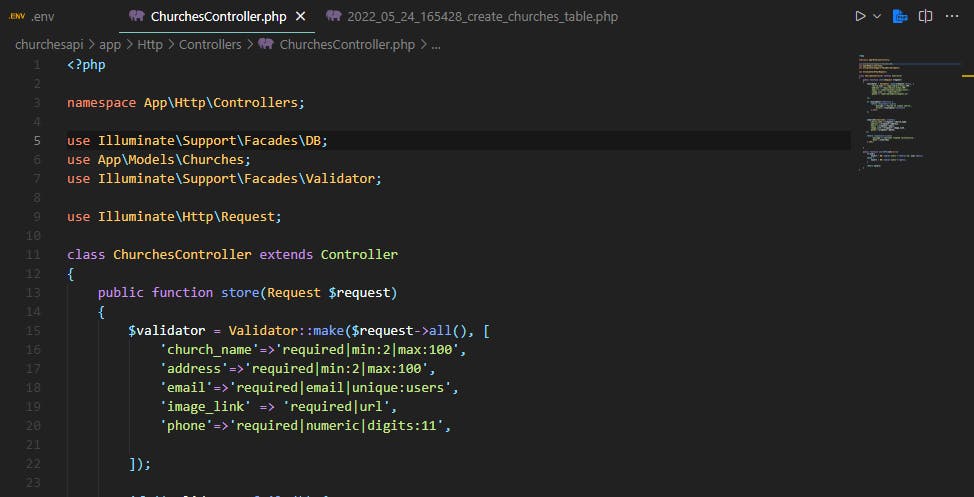
Our first method will be a store method. For this method, we will use the validator facade in Laravel to create validation rules for our entries. And if any entry does not meet our validation rules, this method will return a 422 status code along with the validation error message. If the entries meet our validation rules, we will use a variable($churches) to store the church details in our database using the Churches model. This method will return a status code of 201 along with a success message. Import the validator facade use Illuminate\Support\Facades\Validator; and the Churches Model use App\Models\Churches; at the top of the controller file and paste the method below.
public function store(Request $request)
  {
    $validator = Validator::make($request->all(), [
      'church_name'=>'required|min:2|max:100',
      'address'=>'required|min:2|max:100',
      'email'=>'required|email|unique:users',
      'image_link' => 'required|url',
      'phone'=>'required|numeric|digits:11',

    ]);

    if ($validator->fails()) {
      return response()->json([
        'message'=>'Failed to create church',
        'errors'=>$validator->errors()
      ],422);
    };


    $churches=Churches::create([
      'church_name'=>$request->church_name,
      'address'=>$request->address,
      'email'=>$request->email,
      'image_link'=>$request->image_link,
      'phone'=>$request->phone,
    ]);

    return response()->json([
       'message'=>'Churches created successfully',
       'data'=>$churches
    ],201);


  }
PermalinkSecond Method
The second method will get a list of all the churches stored in our database. Import the database facade use Illuminate\Support\Facades\DB; at the top of the controller file and paste the code below.
public function churches($id=null){
    if($id){
      $churches = DB::table('churches')->where('id',$id)->get();
    }else {
      $churches = DB::table('churches')->get();
    }

    return $churches;
  }
PermalinkThird Method
We will use the third method to search through the list of the churches stored in our database. This method will return all the information about the searched church.
public function searchChurches($id=null){
    if($id){
      $churches = DB::table('churches')->where('church_name',$id)->get();
    }else {
      $churches = DB::table('churches')->get();
    }

    return $churches;
  }
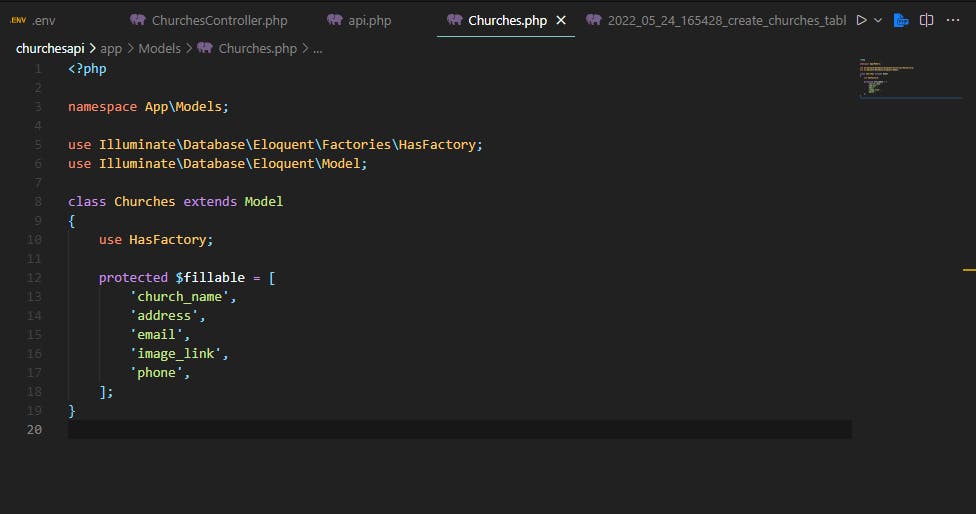
Next, we will open the Churches model file in the Models folder and paste the code below.
protected $fillable = [
    'church_name',
    'address',
    'email',
    'image_link',
    'phone',
  ];
PermalinkCreate API Routes
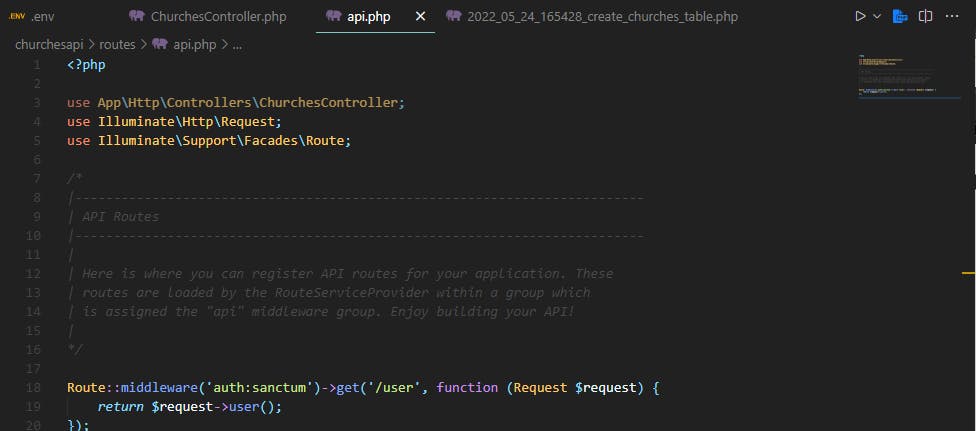
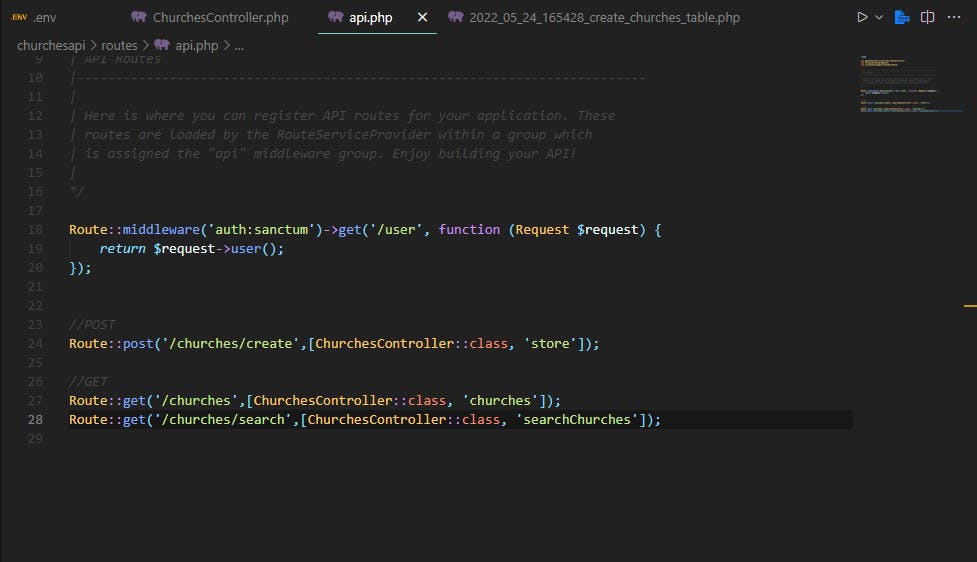
Let’s create our API routes. These routes will contain the endpoints which we will use to send requests through Postman. Our first endpoint will be /churches/create to add a new church to our database. We will use the POST request method here because we want to add new data to our database. The second endpoint will be /churches to get the list of all the churches in our database. And the last endpoint will be /churches/search to search through the list of churches in our database. The second and third endpoints will both use the GET request method because we want to retrieve data from our database. We will go to the api.php file in our route folder. Import the Churchescontroller class use App\Http\Controllers\ChurchesController; and paste the codes below.
//POST
Route::post('/churches/create',[ChurchesController::class, 'store']);
//GET
Route::get('/churches',[ChurchesController::class, 'churches']);
Route::get('/churches/ search',[ChurchesController::class, 'searchChurches']);
PermalinkTesting Our API With Postman
All that is left for us to do now is to test our API with Postman. Make sure that your Laravel application is running before testing the API.
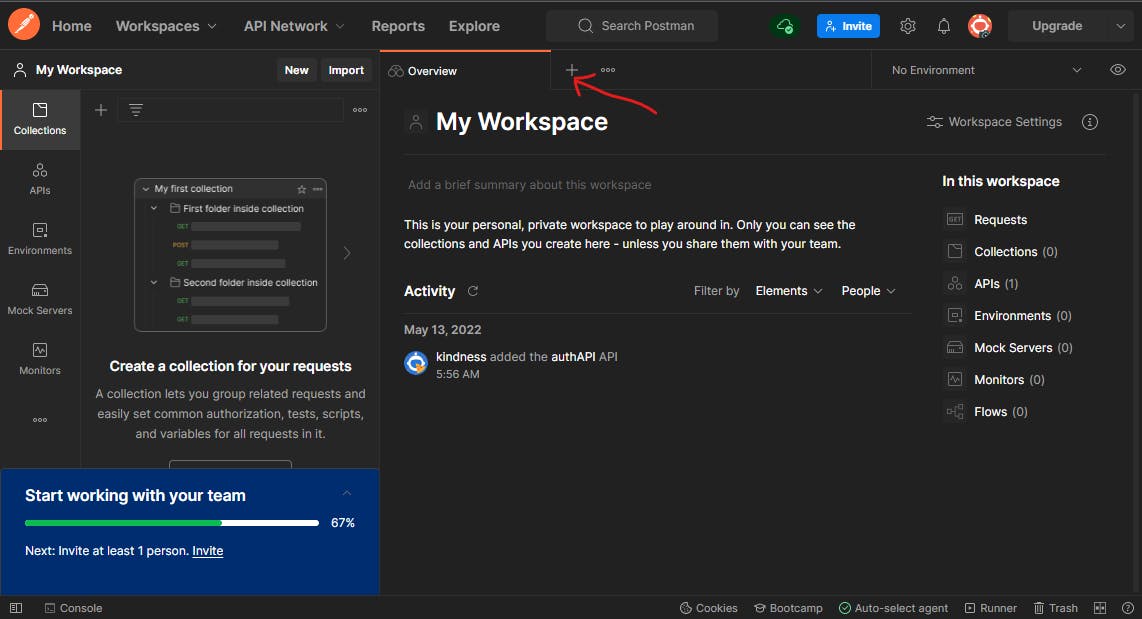
- Step 1
Open Postman in your browser and create a new request tab by clicking the + button.
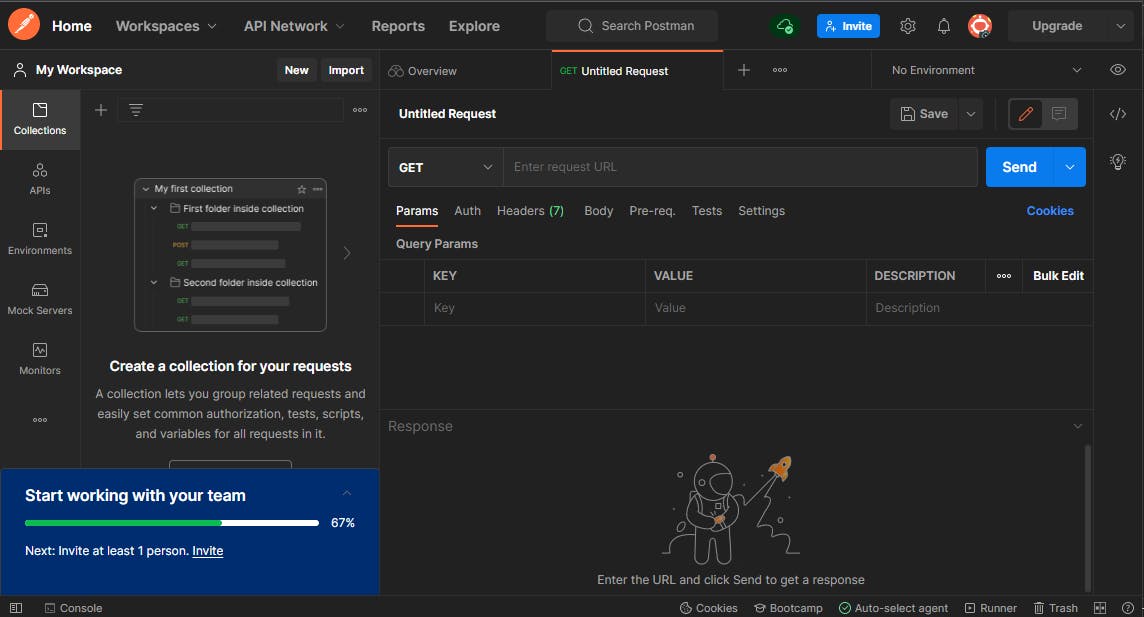
- Step 2
The next step is to put in our API route and send a request. Since we are testing our API locally, the main domain will be http://127.0.0.1:8000 or whatever yours is locally. Next, We add a /api before our endpoint.
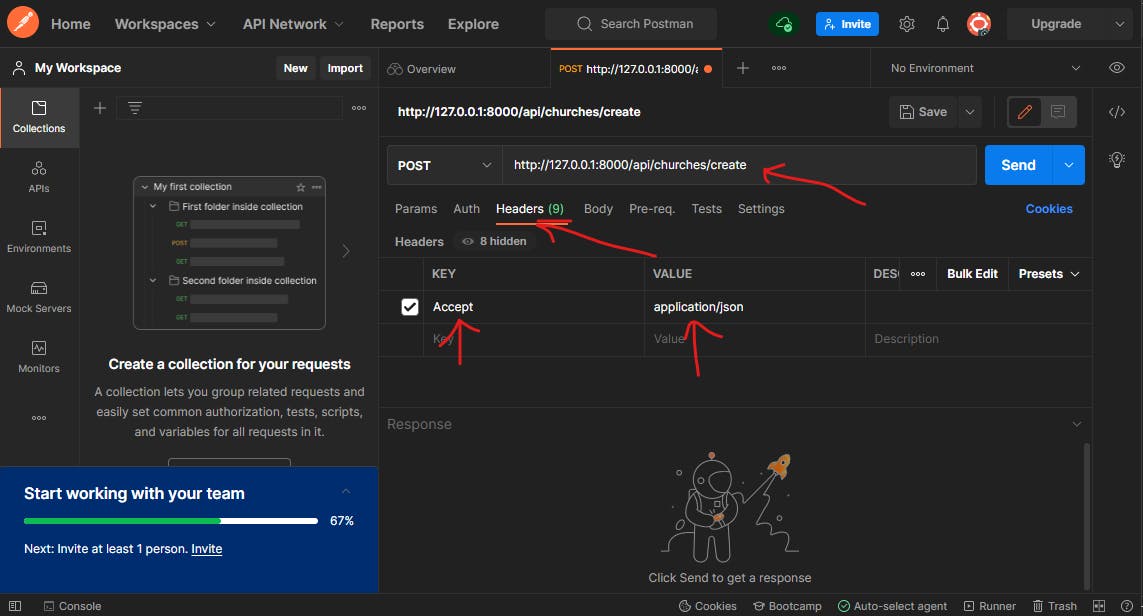
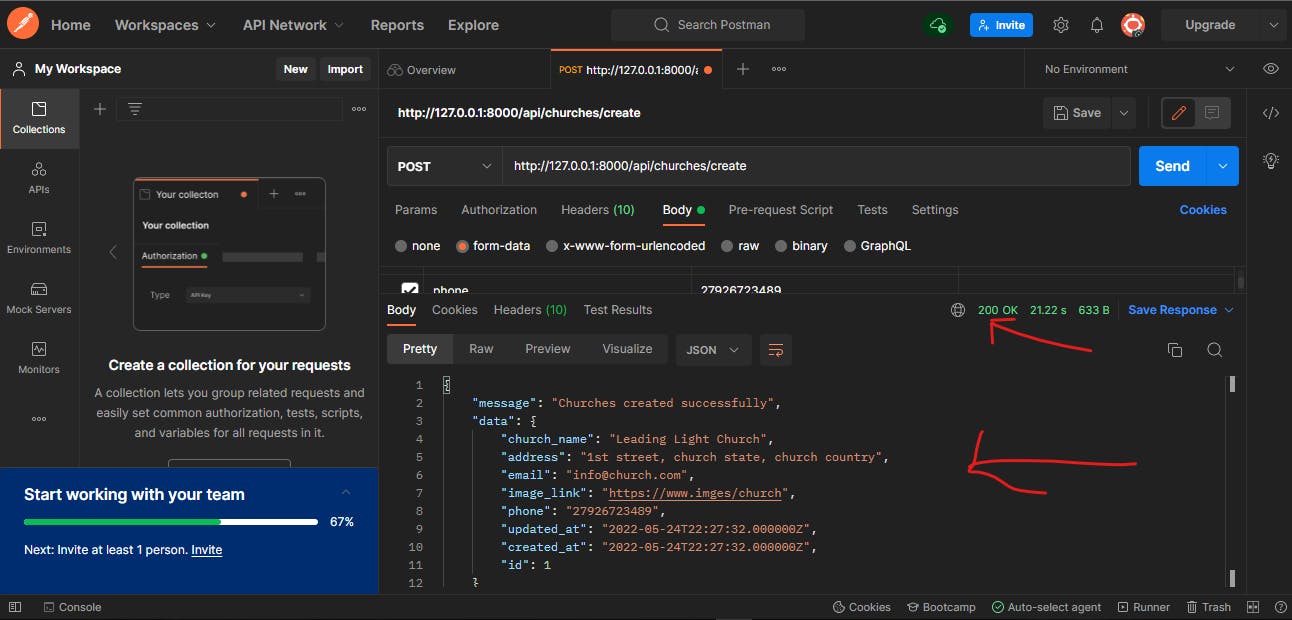
Our first route is http://127.0.0.1:8000/api/churches/create. First, we will paste the route link and select the post method. In the Headers tab, we create a key to accept JSON.
In the Body tab, we will select form-data and fill in the key attributes for our entries. Then we will fill in the value for each attribute.
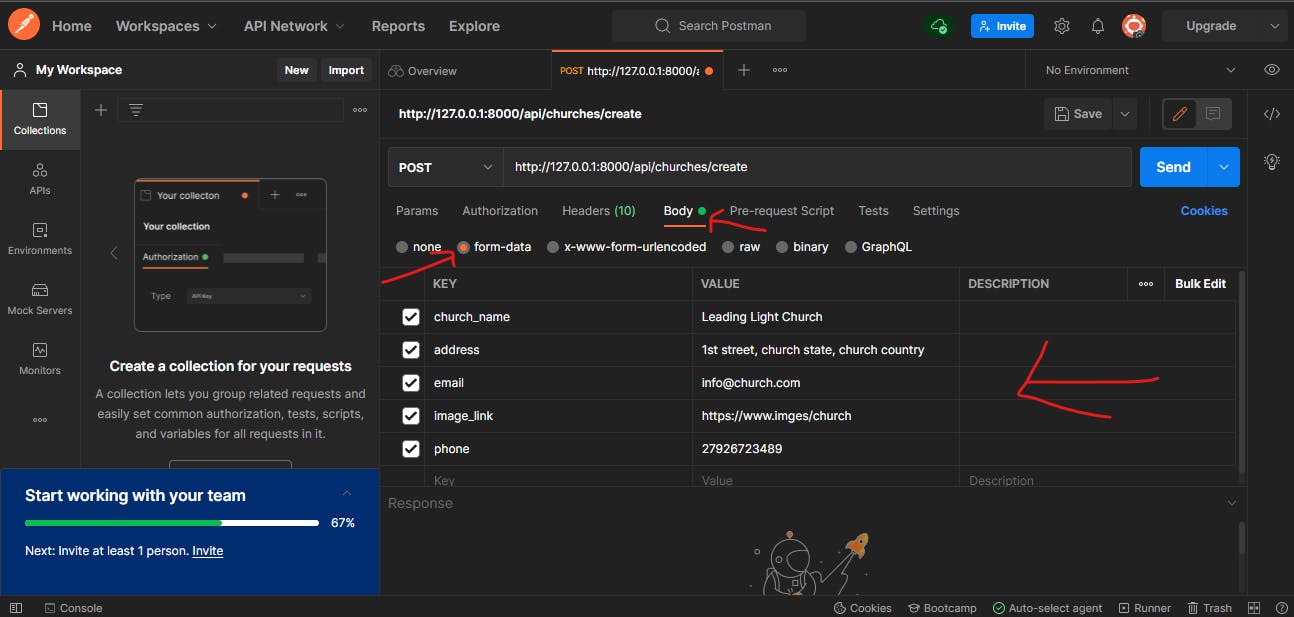
We will click the Send button to add a new church to our database. If all the validations are met, our API will return a 200 status code along with a success message and all the information stored in our database.
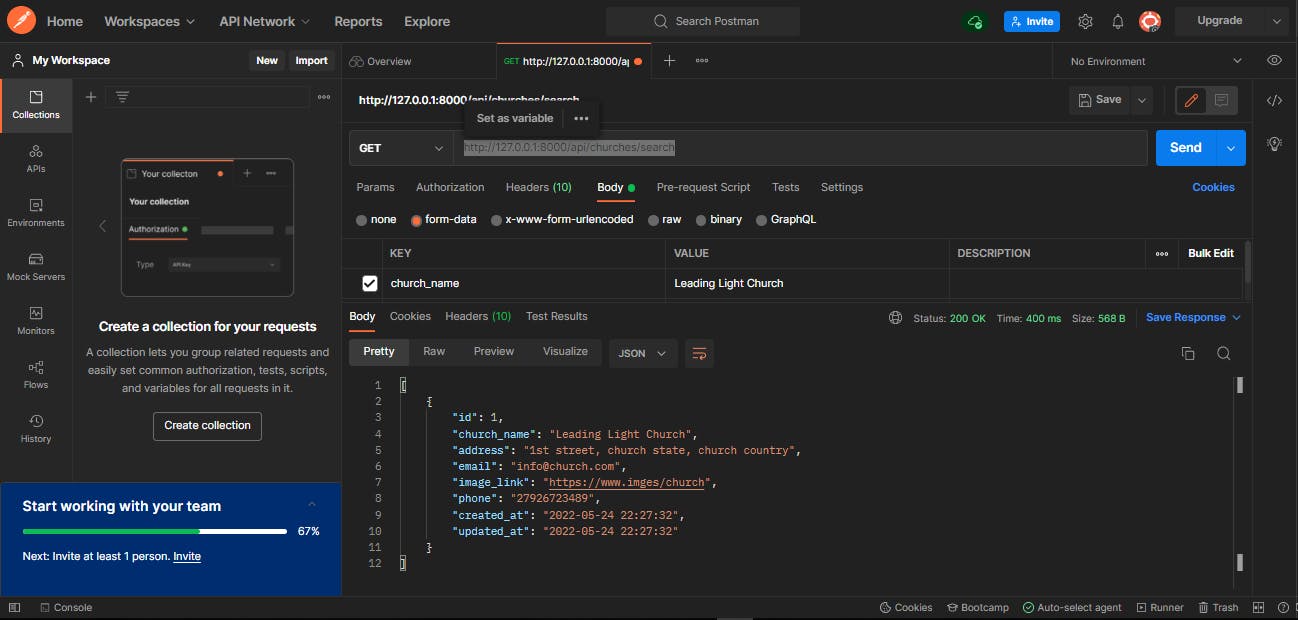
- Step 3
We test our search API using this route http://127.0.0.1:8000/api/churches/search. We will use the GET request method since we want to search.
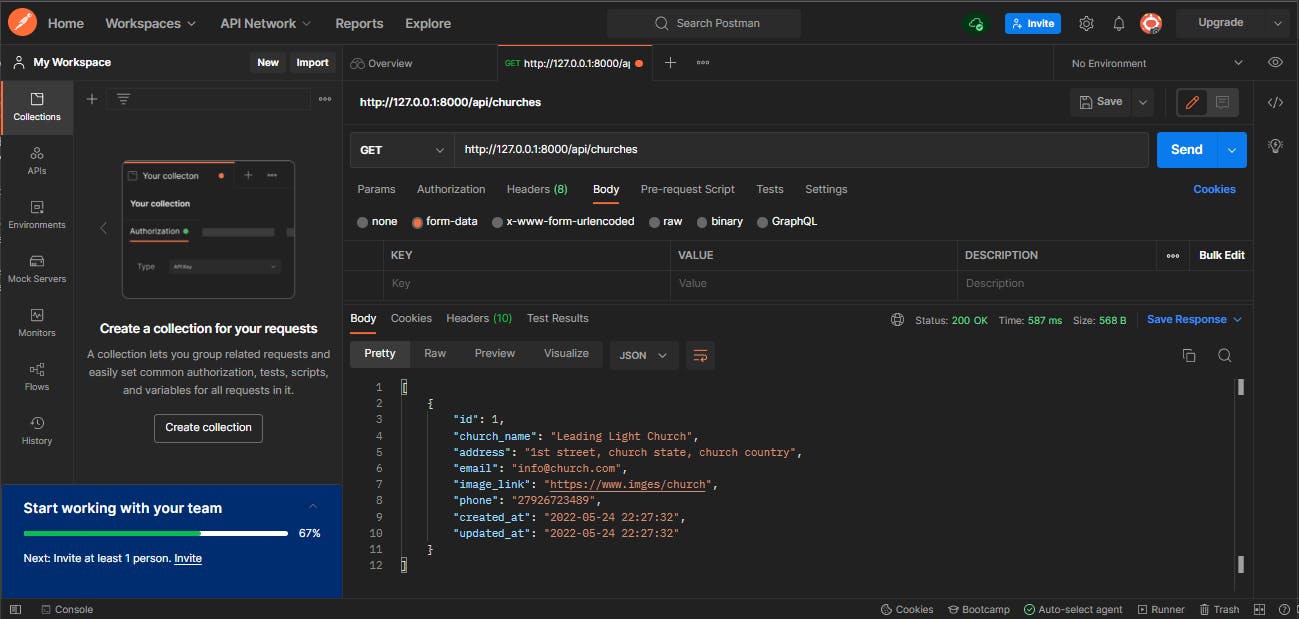
- Step 4
Get the list of all the churches stored in our database using the http://127.0.0.1:8000/api/churches route. We will use the GET request method only because we will not need to use any key attribute in the form-data at this time. A list of the churches stored in our database will be returned.
PermalinkConclusion
APIs are a good way to create communication between a server and a client. Data can also be stored and retrieved using APIs. You can give API a try in your next web development project and get to understand more about how APIs work.